Tuesday, December 6, 2011

Glazed pieces

I was so delighted to see the finish on the first four pieces that came out of the kiln. The glaze was lovely and the black had come out really intensely. Unfortunately though, the tecnician had rubbed the glaze from the rim of the pots so that presumably the lids could be fired on the pots. This gave a disappointing finish so I need to find out a way to keep the glaze on the rim of the pots and still fire the lids properly.

I was concerned that the first two pots I had done with the slip decoration would be very like footballs and while I do feel they are certainly a little too suggestive of footballs, I quite liked them as pieces.


I was really pleasesd with the other type of decoration, in painting the stain straight on. My first small pot had a lovely finish.


Very sadly however, the final three pieces done with this same preferred type of decoration were not fired to high enough a temperature due to a malfunction of the kiln so the glaze did not vitrify properly. there wasn't time to have these three re-fired. It was disappointing but hopefully I can fire them again to 1250 and they will come out nicely.


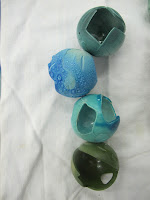
The final three pots. The glaze is opaque in places as they need to be re-fired.


Saturday, November 26, 2011

Surface decoration

Having made the forms, the challenge then arose as to how to apply the surface decoration of the stripes and hexagons. The problem lay in the fact that it was not just one spherical shape that I was applying the hexagons to but rather they would carry over 3. Getting them to properly tesselate over each seam was really difficult.
I had previously looked at the possibility of using further clay on the surface to mould the hexagons to the surface of the pot. I wanted it to be flat in relief though.


First I applied black slip over the top spherical parts of the pots and from this drew circles and then made those circles into hexagons. This meant the hexagons did travel into each sphere but I wasn't really satisfied with how random the sizes were and the fact that they didn't really tesellate properly. It gave more of  an animal print impression I felt.

The two below on the right are the patterns carved from the slip covered surface. A little like a giraffe print I think.

I then examined the roof on the museum and how the hexagons were applied there and also the work of Nicholas Grimshaw in the Eden Project in Cornwall. In this he has huge dome shapes that touch each other and are covered with hexagons. In both cases, the tesselating hexagonal pattern was restricted to eah individual dome. When a new spherical shape started, a new set of hexagons was applied. As you can see in the middle pot above, I applied this technique, first drawing on the hexagons and then painting them in with a mixture of black stain and slip. I made the size of the hexagons decrease as the went further up the pot.


This is a close up of a piece by the very famous Hungarian Herend porcelain company. Each piece is very expensive but hand-painted with intriciate designs that perfectly fit into the shape of the form.


Taking inspiration from this in a much more simplified and less perfect way, the hand-painted hexagons was the method I decided to use to decorate the remainder of the pots.

Monday, November 21, 2011

In the persuit of perfection

Making positive forms and consequently moulds and cast pieces is a process that needs a certain degree of perfection. Looking around at the moulds in the studio, they themselves are almost works of art, perfectly even cut lines and smooth perfectly even surfaces. Unfortunately, despite much effort my moulds are not so beautiful and when I took out the positive forms, there were bubbles inside the big one. This was obviously due to my plaster having lumps or my not pouring the plaster around the form properly. I think I need to remember though that this is my first experience in this process and that the learning is what is most important here. One of my lid moulds too was far less than perfect due to the fact that my sharing line was in the wrong place. These are all things I can learn from though and improve on in the future.


My imperfect mould.


My first casts turned out really well though despite everything and with a little care and attention, they cleaned up very nicely.

Tuesday, November 15, 2011

If at first you don't suceed...

I wanted my pot to have a capacity of 500ml to hold the amount of honey that's most common here to buy in jars in the shops. I was concerned, despite many efforts at technical drawings trying to calculate the capacity my designed piece would have, that what I had made would be too small. Therefore, I decided to increase my design on the photocopier by 22% and make a second mould. This was good as I could learn the other method of creating a 2 piece mould anyway.


The two sizes I made...I'm not sure yet what their actual capacities will be.


The next step was to make the lids. This had to be done on the wheel and turned very quickly as the plaster dried so quickly. I managed to make a good shape for the large pot which I was happy with but the smaller one has a flater lid than I would have liked. It took 6 failed lids to finally achieve these two. A Hungarian student told me that from the time I pour the plaster into the mould at the top of the pot, I only have 5 minutes in which to create the shape fior the lid or otherwise it will be too late and too hard. I definitely need more practise to master this skill!


This is the 2nd larger form ready to have plaster poured on top and be made into a mould.

Thursday, November 3, 2011

The beginning of the making!

Yesterday I started making my mould. I was apprehensive as using the lathe was new for me and the thought scared me! I made the plaster cylinder around the centre of the wheel and was shown how to use the lathe and begin to turn the plaster to make my shape and then left alone to figure it all out and get the feel for what I was doing. This was the best way to learn. I managed to create a shape I was very pleased with by very frequent measuring of my form and comparing it to my design image. I was also advised to put a piece of paper with the side profile of the design cut out so I could follow that to get the shape too. It's good to have the flexibility to be able to tweak the form as you watch it take take shape if you think something will improve on the design you have. I need to make my surface smooth still but I'm very pleased with my first step!

Friday, October 21, 2011

Early ideas

Being very restricted with materials and resources, these pictures show my roughly made maquettes of the sort of design I want to create. I don't think the honey swirler should be made from ceramic but perhaps metal would  compliment the pot design better. I will need to speak to the other departments at the college here and hopefully something will be possible.


The  below picture is a close up of the hexagonal tiles that make up the coloured, patterned roof of the Museum of Applied Arts which is where my ceramic department is located. I like the fact that the pattern I have chosen in the hexagons reflect the honey theme but also reflect something of my current surroundings.

Thursday, October 13, 2011

Budapest!

This semester I am not in Limerick but in Budapest, studying at Moholy-Nagy University of Art and Design. Things were difficult to adapt to at first here as the system and way of working is very different from home. Firstly we were not given a brief, but vague guidelines as to what type of an object I should make and after that it was really up to me. Also there is just Cliona from Limerick in my class and we have no actual college class time except a crit. on a Friday.

I decided I wanted to make a small object that would be functional and able to be given as a present. I wanted it to be generic. I accumulated a long list of possible objects I could make and finally got it down as far as a honey pot, a sugar bowl or a match striker. In the end I chose a honey pot. Unfortunately I can't seem to be able to upload pictures at the moment.
I realised how important it is to create a piece with it's purpose in mind. From a consumer point of view, an object needs to be something they can imagine themselves using and so something that immediately seems fit for it's purpose. Instead of using a typical hive shape or bee decoration, I decided to work on uing the stripe pattern and the honeycomb hexagonal pattern and to use the 3 part bee body form as the shape for the actual pot.

Thursday, May 19, 2011

My Little Movies

'Freedom'- My first attempt!
I did the filming for this very simply, keeping the camera in the same position and simply moving the figures.
My next attempt was longer and more successful but I haven't managed to upload it yet.


Wednesday, May 11, 2011

Moving on

My horse did survive the holidays without cracking but in order to give it the best chance possible to dry out, we're going to give it right to the end before we fire it. I was really keen to see how the surface treatment would turn out after firing and also to in some way advance with this project so I decided to make miniatures. I love the way the little rider with the short legs holds on so tightly to the horse's neck. It's as if it has been so much effort to climb up, he's determined not to fall off. I made a series of 5 miniatures showing the little man's attempts to get up on the horse. These I painted with the same mixture of black ball clay and rutile. Being smaller, it would be possible to get those fired before assessments too.


My original aim was to simply highlight the piece from the Hunt Museum. To do this I increased it in size and took it out of the cabinet shelf setting. With these miniatures, in order to progress with that idea, I took them into the outside world where they can be interacted with and noticed. In order to bring them to life, I made 2 very short and simple stop-motion videos.

Tuesday, April 26, 2011

The drying process

Over the two weeks of the Easter holidays my horse and rider have been left with two sheets of plastic laid loosely over them in order for them to dry out. Such a big piece needs at least the two weeks in order to be dry enough to fire. I really just hope it will be ok left like this unattended for the two weeks and there won't be any horrible cracks when I return...

Mathematical Construction

For each individual part, I measured each dimension on a small photo of the original piece and proportionally enlarged the measurements to the maximum size that would fit in the kiln. Unfortunately though, even though I had worked very accurately in the beginning, when I began to put the pieces together, some stretching occurred with the legs which made them slightly out of proportion. I later rectified this though with balancing out other parts. Hence, unfortunately I cannot say that I have created an exactly proportionate enlarged reproduction of the original but it is as close a representation as I could manage for my first attempt!
 The legs, body, tail and the body of the figure were all made using coiled and so are hollow.

 The head of the horse and rider, I modelled solid and later hollowed them out.
 Following further examination of the original piece, I realised that in fact the horse only had one bump where his legs and tail met instead of three so I had to remodel this part.
This is the piece finished before any surface treatment was added. I made a block of plaster and with modelling tools, dented the surface to make a rough, stone-like texture. This I pressed into the finished piece to create a textured stone-like surface. I experimented with various oxides on green damp clay in order to try to reproduce a colour that would echo the sandy tones of the original.

Monday, April 11, 2011

A Hunt Museum Souvenir

Our current project is inspired by aspects of The Hunt Museum. Our brief is to state our standing on the meaning of the term 'souvenier' and inspired by an object or gropup of objects from The Hunt, create our own souvenir in the form of a contemporary piece.
For this project I am defining a souvenir as: a reproduction of another object, to take away to remind you of the original.
Having viewed the various varied collections of objects and artefacts in The Hunt, I chose a very small ceramic statuette of a horse and rider dating from possibly 1800 B.C. and of Hittite origin. I love the simplicity of the piece and how the horse and rider have been stylised. I think this piece has real character the way the horse stands still and straight as the little figure wraps his arms around the his neck, holding on so tightly.


I decided to create a reproduction of this piece but much larger. I wanted to highlight this little figurine and create a piece that people would notice and be able to touch and interact with, in contrast to the original which sits on a shelf in a glass cabinet and often goes unnoticed to viewers.

Tuesday, March 22, 2011

The fired pieces

Identical in pattern to the first plate which collapsed in the kiln, this attempt survived so much better.Placing it within the setter meant it had the support it needed. unfortunately, some of the weaker areas close to the centre of the plate did crack though. In my next attempt I will change the pattern slightly to give these areas more strength and also balance out the cut out parts a little more. I need to work on a more fitting design for the feet also. Hopefully I'll manage to produce at least one completely intact plate!
The cup was able to support itself and so came out of the kiln perfectly in shape.

Friday, March 11, 2011

The clay translation

I decided to work with porcelain as my clay body to help achieve the girly, lacy, delicate quality within the pieces. This was my first experience of porcelain and due to this I encountered many problems and issues over the past few days.
 Beginning with the plate, I worked with thinly rolled out sheets of porcelain onto which I rolled my lace pattern and then carved into. My first attempt was carved on the flat plaster slab on which I had rolled the clay, however when I lifted the carved and thus weakened sheet in order to place it over a hump mould to shape it, it fell apart due to the change in shape. Due to the thinness of the clay, it also dried much quicker than I was able to work, causing cracks. In my next attempt, rolling the clay a little thicker, I first laid it over the hump and then carved it. This was much more successful and I managed to attach feet and take it off the mould the next day with only minor cracks. The feet were too big though and not in keeping with the design. Also they needed to be placed further out, closer to the edges.


My first attempt.

The next plate unfortunately cracked and fell apart while I was cleaning up its edges but I was able to salvage sections which make quite cute little plates in themselves. Plate number three was happily the most successful.

Not being experienced with the potential softness of porcelain during firing, I didn't use any support for my first plate in the kiln and consequently the edges flopped miserably and so my shape was completely lost. The third plate I coated with a dusting of talc and is in the kiln now in a bed of malachite so I'm hoping for a slightly more shiny finish and that its shape has been preserved!


These are some early cup designs made using a slab around a plaster mould for the first one, slip trailed porcelain slip inside a mould for the second one. The bottom two are slip cast over slip trailed designs inside the mould in pink and white.

I liked the first design best so attempted another one with a much more fitting handle which all fell apart as it was drying. A third successful attempt is pictured below in its green state. This is to be fired to 1220 today so I'm hoping with a support as with the plate, it will survive the heat intact.


My implement is a very simple suggestion of a spoon. Two designs are photographed below. These were in their very early stage, previous to their edges being tidied up. 


Monday, February 28, 2011

Maquettes


For the past few weeks I've been working on drawings in  my sketchbook and making maquettes in paper and card. This is the 'generation of ideas' process- hoping to come up with some designs that are aesthetically pleasing and give across my message but which also can be translated into clay. I want my finished clay 'setting' to gently whisper the words: girly, lacy, floaty, dreamer, wistful, airy-fairy. I've been focusing on creating a filigree effect.
My cup designs.
These are my plate designs. I want to have the plate elevated so it seems almost as if it's floating and the lace effect can create shadows underneath.

Thursday, February 10, 2011

New Project

Our first project this semester is called 'Portrait- A 'Setting'.' Our setting consists of a plate, a drinking vessel and an implement- all linked to the 'idea' of dining. My inspiration subject is Emma in my class. So far after much brainstorming I'm going with the fact that Emma's a dreamer- 'head in the clouds' type of person and also that she loves girly things- lace and bows etc.

Butterflies are pretty flitting little creatures, capable of flight up into the air and so I had thought I'd could incorporate some lace butterflies into my design as a possibility. Below are two images I found online while searching for inspiration.
Not sure who created these but it they're porcelain with a candle inside. Really pretty.

I love these butterflies- they're from a wall in Olso from Nov, 2008

Tuesday, February 1, 2011

And there was colour


I received a lesson in spraying on glazes as his was the most suitable method for my spheres considering their awkward shapes. The glazes were shades of blue and green low-temperature earthenware glazes. (1060 and 1080) Although I used stoneware clay since my spheres are purely decorative the fact that they still remain slightly porus doesn't matter. Though my application technique is still to be perfected, I was really happy with the colours and although my tests achieved very glossy and glassy results, the slightly matt effect on my spheres has a lovely quality in itself.